
Гид по связи в поездках
Japan eSIM: Mobile Connection and Internet
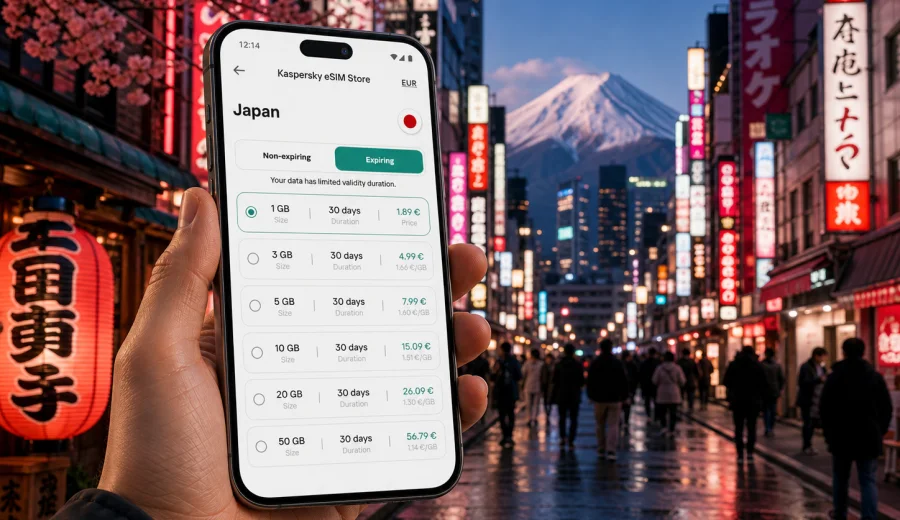
Japan eSIM: mobile connection and internet for your trip
If you are planning a trip to Japan eSIM, mobile internet is one of the first practical things to prepare. Japan is easy to travel around when your phone is online: train routes update in real time, hotel addresses can be shown in Japanese, restaurant reservations are easier to manage, and translation apps help in stations, shops, museums, and taxis.
An eSIM can help you get mobile internet in Japan without looking for a physical SIM card after arrival. You choose a suitable eSIM tariff for the destination, install the digital SIM on a compatible device, and use mobile data during the trip according to the conditions of the selected tariff. Kaspersky eSIM Store is an app and website where you can quickly choose, arrange, and activate an eSIM with a suitable data plan for international travel.
This guide explains how to prepare mobile connection in Japan with eSIM, how to estimate data needs, what to check before purchase, and how to avoid common setup mistakes.
Why mobile internet matters in Japan
Japan is a country where everyday travel often depends on precise digital information. Even short routes can involve several rail companies, different station exits, local buses, and walking segments through large underground complexes. A stable data connection can make these moments simpler.
Common situations where mobile internet is useful in Japan:
- navigating from Narita, Haneda, Kansai, or Chubu airport to your accommodation;
- checking train platforms, delays, transfers, and last-train times;
- translating menus, signs, ticket machines, and short conversations;
- using maps in Tokyo, Kyoto, Osaka, Sapporo, Fukuoka, Nara, Hiroshima, and smaller towns;
- confirming hotel check-in instructions and booking messages;
- ordering taxis or checking ride routes when public transport is less convenient;
- sending photos and updates to family or colleagues;
- using mobile payment, authentication, and travel apps where supported.
Public Wi-Fi exists in many hotels, airports, cafes, and some transport hubs, but it is not always available exactly when you need it. It can also require registration, time limits, or repeated logins. With an eSIM tariff for Japan, you can reduce your dependence on public Wi-Fi and keep essential travel apps ready when you leave the hotel or station.
What an eSIM does in a Japan trip
An eSIM is a digital SIM profile installed on a compatible smartphone or tablet. Instead of inserting a plastic SIM card, you add the eSIM profile to the device settings and use it for mobile data.
For a trip to Japan, an eSIM is mainly useful for internet access. It does not normally include a local phone number, voice calls, or SMS unless those features are clearly included in the specific tariff conditions. For calls and messages, many travelers use internet-based apps over mobile data.
The practical idea is simple:
1. Check that your device supports eSIM and is not locked by a mobile operator.
2. Choose Japan as your destination and select a tariff by data volume and validity period.
3. Install the eSIM before the trip or when you have a stable internet connection.
4. Activate and use the eSIM according to the instructions for your device.
5. Track remaining data and top up if the selected tariff allows it.
The exact experience depends on your phone model, the selected tariff, local network conditions, and how you use data during the trip.
When eSIM is especially convenient in Japan
eSIM is useful for many types of travel, but it is particularly convenient when your route is not limited to one hotel and one familiar city.
| Travel scenario | Why mobile data helps | What to consider |
|---|---|---|
| First visit to Tokyo | Stations are large, routes change by line and exit, and maps are essential | Choose enough data for maps, translation, and messaging |
| Kyoto and Osaka trip | Day trips often include trains, buses, tickets, and walking routes | Check validity period for the full Kansai stay |
| Japan Rail route | Long-distance transfers may require schedule checks and seat information | Prepare the eSIM before your first major transfer |
| Business travel | Email, calendars, maps, and messengers need reliable access | Estimate work data use and video-call needs carefully |
| Ski or nature trip | Wi-Fi may be less predictable outside major city centers | Download offline maps as a backup before leaving the city |
| Family travel | Several people may need navigation and messaging at the same time | Each device needs its own compatible setup unless you use hotspot where allowed |
An eSIM is not a guarantee that every remote mountain road, basement, tunnel, or rural area will have the same signal quality. Coverage and speed depend on local network conditions. For travel planning, treat eSIM as a flexible way to prepare mobile data, not as a promise that every location will behave identically.
How to choose an eSIM tariff for Japan
The best tariff is the one that matches your trip length, route, and data habits. Do not choose only by the largest number of gigabytes. A short business trip, a two-week family holiday, and a month of remote work have different needs.
Start with four questions:
- How many days will you be in Japan?
- Will you mostly use maps and messages, or also video, cloud backups, and hotspot?
- Will you stay in major cities or travel across regions?
- Do you need data immediately after landing, or can you set up after reaching your hotel?
Here is a practical way to estimate data:
| Data use style | Typical activities | Suggested approach |
|---|---|---|
| Light | maps, messaging, email, translation, tickets | choose a smaller package and keep hotel Wi-Fi for heavy updates |
| Moderate | maps, social apps, photo sharing, regular browsing | choose a mid-size package that covers the whole trip |
| Heavy | video calls, streaming, hotspot, cloud sync | choose a larger package and check hotspot and top-up conditions |
Before choosing, read the tariff details carefully: data volume, validity period, country or region, price, when the validity starts, and whether top-up is available. If your route includes nearby destinations such as South Korea, Taiwan, or Singapore, compare a Japan-only tariff with a regional option where available. A country tariff is often the clearest choice for a Japan-focused trip, while regional coverage can be useful for multi-country travel.
A simple data plan for common Japan trips
You do not need exact forecasting to make a sensible choice, but you should know what usually consumes data quickly. Navigation, messaging, and translation are usually manageable. Video streaming, automatic cloud backup, app updates, and using your phone as a hotspot can use much more data.
For a short city break, keep mobile data for the tasks that matter outside Wi-Fi:
- route search and walking navigation;
- train platforms and transit changes;
- translation camera and text lookup;
- messaging and booking confirmations;
- mobile tickets and email access.
For a longer trip, review your settings before departure:
- disable automatic app updates on mobile data;
- pause cloud photo and video backup unless you really need it;
- download offline maps for areas where you will spend time;
- download language packs if your translation app supports them;
- reduce video quality in streaming apps;
- check whether hotspot use is allowed by the selected tariff.
These small settings can make a moderate tariff last much longer.
Choose a Japan eSIM tariff before you fly
If Japan is your next destination, you can open the Japan page in Kaspersky eSIM Store, compare available data volumes and validity periods, and choose the option that matches your route: choose an eSIM tariff for Japan.
It is often convenient to arrange the eSIM before departure, while you still have stable home internet and time to read the setup instructions. You can also install it after arrival if you have Wi-Fi, but airports are busy places and it is easier to solve settings calmly before the trip.
How to install and activate eSIM for Japan
The exact steps depend on your device, but the general flow is similar: you add the eSIM profile, choose it for mobile data, and enable the settings required by the selected tariff. Use the official setup guide for your operating system: Android installation guide or iOS installation guide.
A practical installation checklist:
1. Connect your phone to a stable Wi-Fi network.
2. Make sure the battery is charged.
3. Open the eSIM information in your profile, app, or email.
4. Add the eSIM by following the QR code or on-screen instructions.
5. Name the profile clearly, for example "Japan travel".
6. Keep your regular SIM as the default for calls if you still need it.
7. Set the eSIM as the mobile data line when you are ready to use it.
8. Enable data roaming for the eSIM if the instructions require it.
9. Test the connection after arrival and check that data is using the correct line.
Do not delete the eSIM profile after installation unless support instructions tell you to do so. In many cases, an activated eSIM profile cannot simply be moved to another device.
Device compatibility: check this before purchase
Not every phone supports eSIM, and some devices that support eSIM may still be locked to a mobile operator. Before arranging a tariff, confirm that your model can install eSIM and that it is not restricted by your current carrier. You can use the internal compatibility check here: Check your device.
Pay special attention if:
- the phone was bought through a mobile operator contract;
- the device is an older model;
- the same model has different regional versions;
- you plan to use a tablet or secondary phone;
- you want to keep your physical SIM active at the same time.
If your device does not support eSIM, you may need another compatible device or a different mobile internet option for the trip. It is better to learn this before payment than at the airport.
Arrival in Japan: first-hour setup tips
The first hour after landing is when mobile data is most useful. You may need a train route, hotel address, travel card information, or a message from your host. A little preparation helps.
Before the flight:
- save the eSIM installation instructions offline or keep them in your email;
- take a screenshot of your hotel address in English and Japanese if available;
- download the map area around your airport and hotel;
- keep your booking references accessible offline;
- know which SIM line is assigned to mobile data.
After landing:
- turn off airplane mode;
- select the eSIM as the mobile data line;
- enable data roaming for the eSIM if required by the instructions;
- wait a few minutes for network registration;
- open a low-data page or messaging app to test the connection;
- avoid starting large app updates immediately.
If the phone does not connect right away, do not repeatedly delete and reinstall the eSIM. Check the selected data line, roaming setting, APN instructions if provided, and whether the tariff validity has started. If the issue continues, contact support with your device model and a description of the steps already tried.
What to check in tariff conditions
Before you confirm a tariff, read the details. This is especially important for longer trips and heavy data use.
Check these points:
- destination: Japan or a region that includes Japan;
- data amount: enough for your expected usage;
- validity period: covers arrival and departure days;
- activation rules: when the validity period starts;
- hotspot: whether tethering is allowed or limited;
- top-up: whether more data can be added;
- supported device requirements;
- refund and support conditions.
Avoid assuming that all eSIM tariffs behave the same way. Conditions can differ by destination and selected option. For Japan routes that combine Tokyo, Kyoto, Osaka, Hokkaido, Okinawa, or regional day trips, give yourself enough validity for arrival and departure days, not only for the nights booked in hotels.
Practical data habits in Japan
Use mobile data for live tasks and move heavy downloads to trusted Wi-Fi when convenient. Download offline maps for your main cities, save booking QR codes, pause cloud photo backup, and keep video streaming for Wi-Fi unless you selected a large data package. If you plan to share data through hotspot, check the tariff conditions first and monitor usage during the trip.
FAQ: Japan eSIM for travel
Can I use eSIM in Japan without changing my phone number?
Usually yes. Many travelers keep their regular SIM active for calls or messages and use the eSIM for mobile data. Check your device settings so mobile data uses the eSIM line and your usual SIM remains available if you need it.
Does a Japan eSIM include phone calls and SMS?
In most travel scenarios, eSIM tariffs are designed for mobile data. Calls and SMS are not included unless the specific tariff conditions say otherwise. You can use internet-based messaging and calling apps over mobile data.
Should I install eSIM before arriving in Japan?
It is often easier to install before departure while you have stable Wi-Fi. Activation and validity rules depend on the selected tariff, so read the instructions before setting it up.
Do I need data roaming turned on?
Some eSIM tariffs require data roaming to be enabled for the eSIM profile. Follow the setup instructions for the selected tariff and make sure roaming is enabled only for the intended line.
Is eSIM a replacement for travel planning?
No. eSIM helps with mobile internet, but you should still save key information offline: hotel address, booking numbers, emergency contacts, and basic route details.
Short checklist before your Japan trip
Use this checklist a few days before departure:
- Your phone supports eSIM and is not operator-locked.
- You have selected a tariff for Japan or a suitable region.
- The validity period covers your real travel dates.
- You understand when data usage or validity begins.
- You know whether hotspot is available.
- The eSIM installation instructions are saved.
- Your regular SIM settings are clear.
- Offline maps and bookings are saved.
- Automatic updates and cloud backups are controlled.
This preparation keeps the focus on the trip instead of phone settings.
Choose your eSIM tariff for Japan
Kaspersky eSIM Store helps you choose, arrange, and activate an eSIM with a suitable data plan for mobile internet during international travel. For Japan, compare the available options by data volume, validity period, and conditions before departure, then install the eSIM on a compatible device.
Choose an eSIM tariff for your Japan trip: Japan eSIM.